I touched upon PHP in a few previous posts, most heavily in Moving to a MySQL Database as a way to hack database information into a WordPress page. Dynamically writing HTML is exactly what PHP does so I will be using extensively in this post.
Specifying Database User Information
The first thing that needs to be created is a file that contains all of the database user credentials and information. I made a file /var/www/p101/global-scripts/blogger_db_creds.php to contain this. You can visit this file by going to the global-scripts directory of any p101 website but it will show up as a blank screen because code within PHP tags is not displayed to the end user. The opening PHP tag is not closed in this file because it does not need to show any content.
<?php
        $host   = 'localhost';
        $db     = 'database';
        $user   = 'username';
        $pass   = 'password';
        $charset= 'utf8mb4';

        $dsn = "mysql:host=".$host.";dbname=".$db.";charset=".$charset;
        $pdo = new PDO($dsn, $user, $pass);
With the database user credentials written out they next have to be included at the top of the index.php file. Doing this allows the variables set in the previous file to be used in the current one.
<?php
        include "/var/www/p101/global-sites/blogger_db_creds.php";
Querying Content
Just below the include line we can build the query which will retrieve the content that should be on the page. Because this single PHP file will serve the entire website consideration must be taken to cover all possible bases. The scenarios I identified are listed below:
- Homepage
- Year
- Year and Month
- Individual post
- Page
- Label
- Text Search
Each of the above scenarios are what can be determined from looking at the URL bar on the Wayback Machine. Each of the scenarios except for individual posts and pages are those which display multiple posts and must derive which ones are shown using parameters. Parameters can be seen in the URL after a question mark character ? and separated by the ampersand &. They are meant to pass information to the server about what to do. The two parameters used by Blogger sites are updated-max and max-results. They tell index.php to show sites created after the provided date/time and to limit the results to a certain amount, respectively.
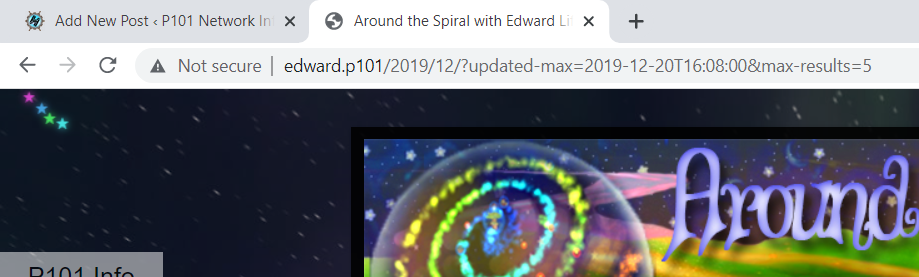
Instead of just having the two updated-max and max-results parameters, I am going to pass all of the information in the query string. I’ll explain it in depth later but this will prevent me from having to actually create the /2019 and /12 directories. These parameters will then be accessible in PHP using the $_GET array. Where the URL reads index.php?year=2019 I can get that info from $_GET["year"]. I’m not going to show all the logic of how to deal with the parameters because there is a lot of it, but this is generally how I did it.
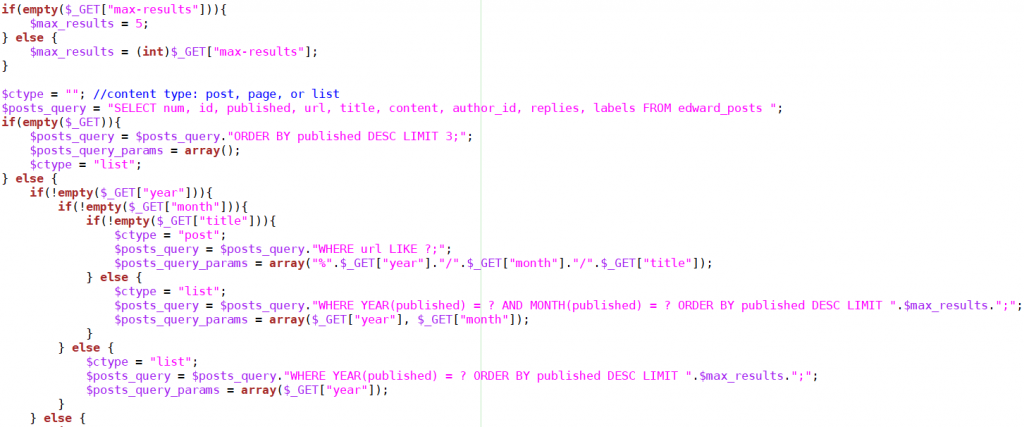
First assign max-results to a default of 5 if it is not provided. Then initialize a string $ctype which will describe what type of content will be shown. All queries to the database will start with the SELECT so this is created once at the beginning. If no parameters are provided then the ORDER BY clause is appended to the query and it is ready to display the latest 5 posts. If at least one parameter is provided and year is in that list, it checks for the month. If year, month, and title are included in the parameters string then a single post is queried for with the WHERE clause. The ? in this clause is for passing text into a prepared statement, a necessity to prevent SQL injection attacks. The data that will fill in for the ? is in the $posts_query_params variable as an array containing one string that is a concatenation of the year, month, and title of the post.
> Query string empty
> Query string not empty
  > Year provided
    > Month provided
      > Post title provided
      > Post title not provided
    > Month empty
  > Year not provided
    > Post
    > Not Post
      > Label provided
        > Max Results provided
        > Max Results empty
      > Label empty
        > Max Results provided
        > 404
This is the logical tree that is followed to determine the query to send to the database. I guess I could have formatted this as an elseif tree but I wanted a strictly binary yes or no relationship with each of the fields that decide what is shown to the user.
Loading Blogger Template from File
With that out of the way we can now begin the actual HTML of the page. It starts with a <!DOCTYPE> header tag and then continues on with some links and meta tags. After about thirty lines we need to include the Blogger template. I cut it from index.php and placed it in /var/www/p101/edward/static/blogger_template.txt just so I could maneuver around the page without ~550 lines of CSS I would never need to touch. Instead of linking to the file in a tag, I opted to actually display this information in the HTML after the user loads the page because that’s how it’s done by Blogger.
<?php
        $blogger_template = file_get_contents("static/blogger_template.txt");
        echo $blogger_template;
?>
Dynamically Create Page Menu

This is the first application where the process of automating repeated sections of code is useful. In Edward’s site there is a list of pages at the top which link to the page that is listed and, as a nice touch, turn purple to indicate if that page is currently being displayed. I have more examples of this kind of automation later but I think this is a good, simple example that can be grasped easily. Also, while it would be easy to just have the HTML hardcoded, it would be much messier and require repeated logic to mark the relevant page purple.
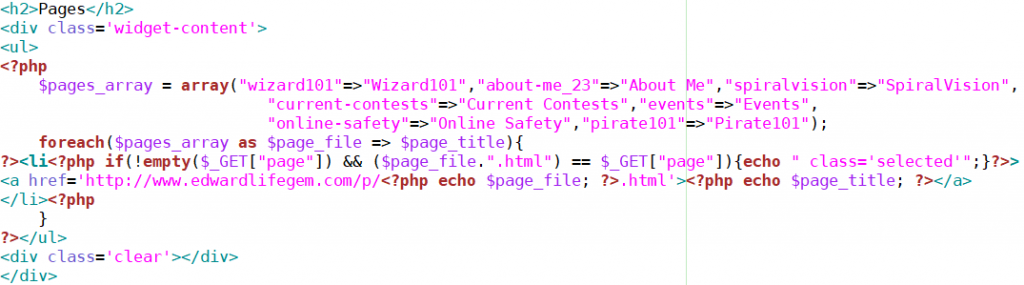
I created an associative array which maps the filename of the page (without the .html at the end) to its clean display name. The first string is accessible with $page_file and the second with $page_title. Then for each entry in the array a <li> tag is created and, if it is the current page, add class='selected' (to turn it purple). That is what the echo keyword does: send the string or variable directly to the final HTML. The whole thing looks a little messy because with PHP you can butt directly into the HTML using the opening and closing tags. Incredibly, you can even do this in the middle of strings, as I have done to modify the link in the <a> tag. Generally in the color scheme above, purple, and red are PHP while green is HTML. Strings are pink in both and comments are blue in both.
Writing Retrieved Content to the Webpage
With a lot of the preliminary stuff out of the way we have now arrived to the meat of each webpage: the scraped content. The first step is to query the database with the query string constructed at the beginning of index.php. Because we are working with prepared statements there is a specific order to query the database. First is to prepare the statement and second is to execute it with the provided parameters.
<?php
	if($ctype == "post" || $ctype == "list"){
		$content = $pdo->prepare($posts_query);
		$content->execute($posts_query_params);
		// useful for debugging
		// echo var_dump($content->errorInfo());
	} else {
		$content = $pdo->prepare($pages_query);
		$content->execute($pages_query_params);
	}
Now that the query has been executed we can read from it line-by-line. The following for loop takes care of that and saves some information about the first post which will be used later. The $clean_date line just saves a formatted version of the date that is returned from the database.
$not_loaded_content = true;
while ($row = $content->fetch(PDO::FETCH_ASSOC)){
if($not_loaded_content){
$newer_post_num = $row["num"] + 1;
$first_post_published = $row["published"];
$not_loaded_content = false;
}
$clean_date = date_format(date_create($row["published"]),"F j, Y");
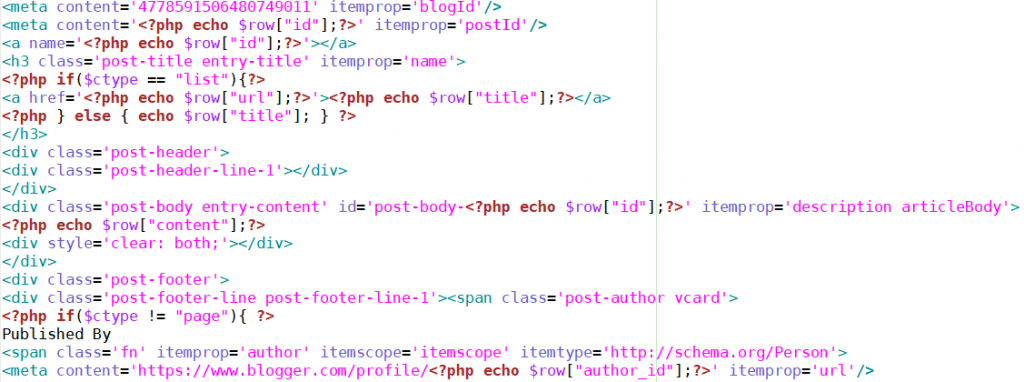
?><!-- start HTML that is created for each post -->
Below is just a portion of the HTML that is required for each post. There is only one copy of everything because the loop will take care of adding additional posts without the need for any different code on our part. There are a lot of instances where what would have been hardcoded in the downloaded Wayback Machine file will need to be made general to the post that each loop iteration displays. The entire text content of each post is created in the one simple, concise echo $row["content"]; line.